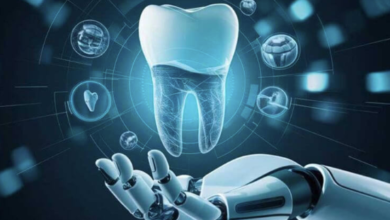
Dental implants can steady your mouth, protect your jaw, and restore your bite after tooth loss. You may feel uneasy about surgery. You deserve clear steps, not guesswork. This guide walks you through the 4 essential stages of implant placement so you know what to expect, how it feels, and how to prepare. First you learn if implants are right for you. Next you see how the implant is placed. Then you understand the healing phase. Finally you see how the new tooth is attached. Each step protects your health and lowers risk. Careful planning also shortens recovery and helps you return to normal life. If you ever face sudden tooth loss or severe pain, a Sequim emergency dentist can help stabilize the problem and support implant planning. You are not alone. You can move forward with clear information and steady support.
Step 1: Evaluation And Planning
The first step is a full check of your mouth and health. You sit down with your dentist or specialist and talk about your goals, fears, and budget. You also review your medical history and current medicines. This helps your team protect you during surgery.
During this visit you can expect three main checks.
- Visual exam of your teeth and gums
- X rays or 3D scans of your jawbone
These tests show if your bone is strong enough for an implant. They also show nerve paths and sinus spaces so your dentist can avoid harm. The National Institute of Dental and Craniofacial Research explains that this planning stage is key for long term success.
At this step, you also talk about choices. You may compare one implant, several implants, or other tooth replacement options. You can ask about cost, number of visits, and healing time.
See also: 4- Seater Dining Sets for Rent: The Perfect Fit for Compact Homes and Apartments
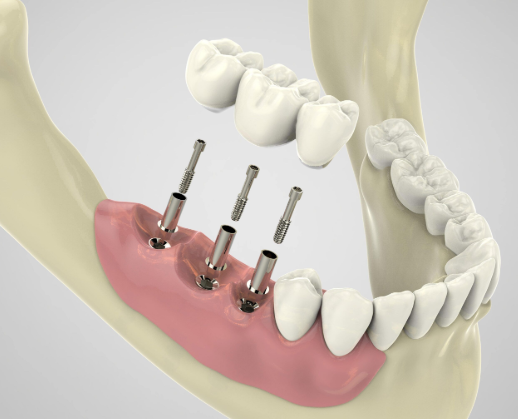
Step 2: Implant Placement Surgery
Next comes the visit when the implant goes into your jaw. You receive numbing medicine in the mouth. Sometimes you may receive extra calming medicine by mouth or through a small tube in your arm. You feel pressure but not sharp pain.
The process follows a clear path.
- Your dentist opens the gum over the bone
- Your dentist shapes a small space in the bone
- The metal implant post is placed into that space
- The gum is closed over or around the post
The metal post acts like a new root. It sits hidden under the gum so your bone can grow around it. This visit often takes one to two hours for a single implant. The time can change with bone quality and the number of implants.
After surgery, you receive clear written instructions. You also receive pain control and infection prevention plans. You go home the same day with a follow-up visit already set.
Step 3: Healing And Bone Bonding
The third step is quiet but powerful. Your bone slowly attaches to the implant in a process called fusion. This gives the implant its strength. It also protects your bite from shifting.
Healing often takes several months. The speed depends on your health, age, and bone quality. During this time, you may wear a small temporary tooth or partial denture to fill the space. You eat softer foods at first. You avoid chewing hard items on the implant side.
Good daily care during healing is crucial.
- Brush at least twice a day with a soft brush
- Clean between teeth once a day
- Use any rinses your dentist prescribes
- Do not smoke or vape
The Centers for Disease Control and Prevention notes that smoking raises the risk of gum disease and tooth loss. It can also slow healing after surgery.
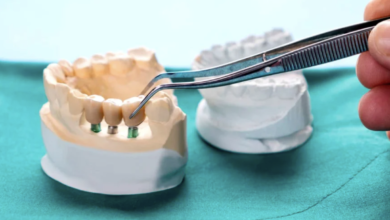
Step 4: Abutment And Final Crown
After your bone has bonded well with the implant, you return for the final parts. First, your dentist checks that the implant is firm. Then your dentist places a small connector called an abutment on top of the implant. This connector holds the new tooth.
Your dentist then takes molds or digital scans of your teeth. A lab uses these to shape a crown that matches your bite and color. This ensures the new tooth blends in when you smile and chew.
At the last visit, your dentist attached the crown to the abutment. Your dentist checks three things.
- How the teeth meet when you bite
- How the teeth slide when you move your jaw
- How the crown touches the gums
Small changes are common. Your dentist may smooth or adjust the crown so your bite feels natural and steady.
Comparing Tooth Replacement Options
This table gives a simple comparison of common tooth replacement choices. It is a guide. Your own choices should follow a talk with your dentist.
| Option | Stays In Mouth | Protects Jawbone | Effect On Nearby Teeth | Typical Feel When Chewing |
|---|---|---|---|---|
| Single Dental Implant | Yes | Yes | No grinding of nearby teeth | Most like a natural tooth |
| Fixed Bridge | Yes | No | Nearby teeth often need shaping | Stable but less natural |
| Removable Partial Denture | No | No | Clips may rest on nearby teeth | Can move during chewing |
| No Treatment | Not applicable | Bone loss continues | Teeth may drift or tip | Bite can weaken over time |
Staying Healthy After Implant Placement
Once your implant is in place, you care for it like a natural tooth. Regular checkups and cleanings matter. Daily brushing and cleaning between teeth keep the gums tight around the implant. This lowers the risk of infection and bone loss.
You also protect your implant by
- Wearing a mouthguard if you play contact sports
- Using a night guard if you grind your teeth
- Avoiding chewing ice or very hard candy
Clear steps, honest talk, and steady follow-up help you move through implant treatment with less fear. You gain a strong tooth. You also gain more ease when you eat, speak, and smile.